


proefdesigns
Derby Shoe Kit (PU Leather)
Derby Shoe Kit (PU Leather)
Couldn't load pickup availability
- Outsoles
- Insoles
- Instructions
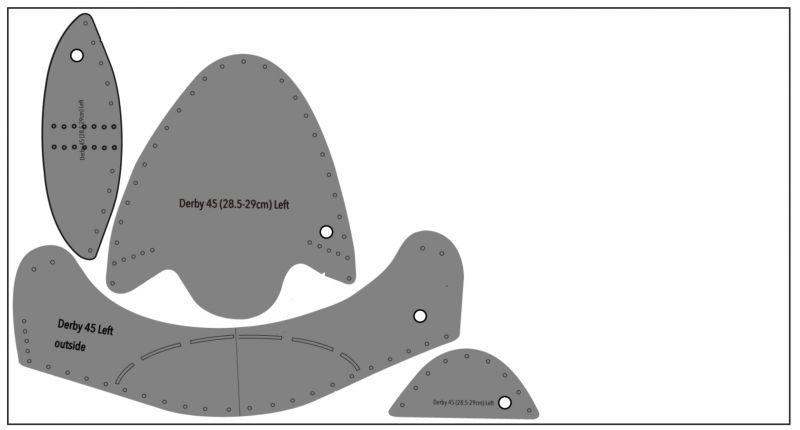
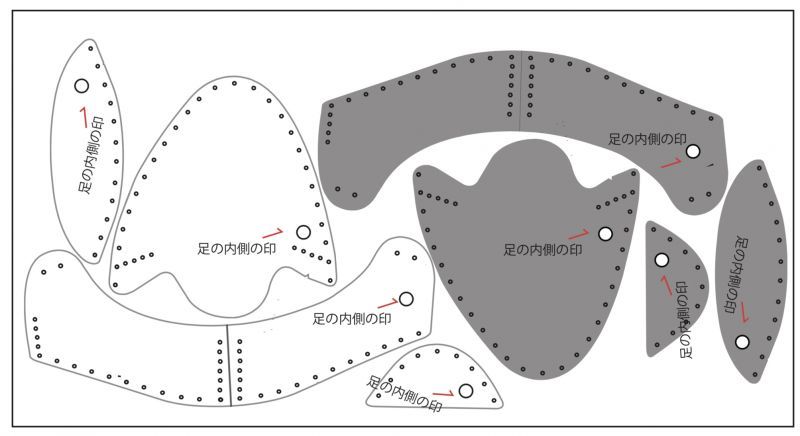
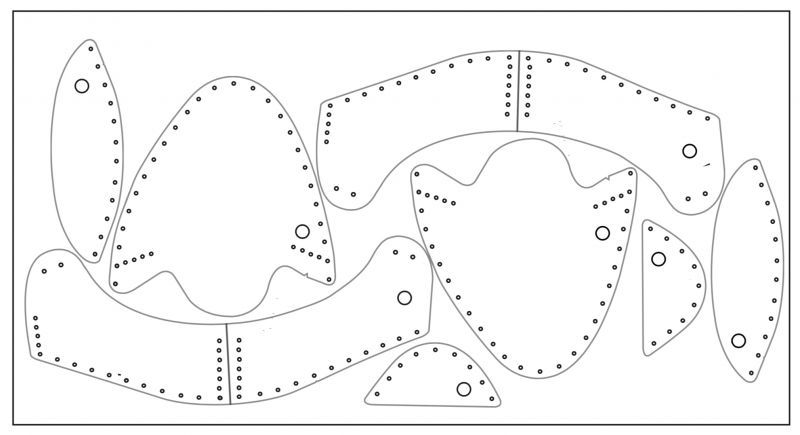
- Patterns
- Thread
- Materials
- Shoelaces
- Eyelets
If you only want to buy soles kit,Please check Soles kit
Step1
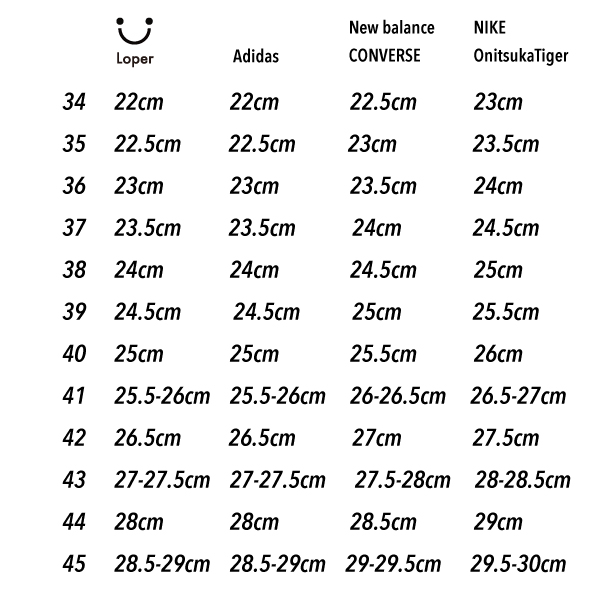
Choose the size
The size may vary slightly depending on the brand and model. Please refer to the table below and compare it with the size of the shoes you usually wear.
Step2
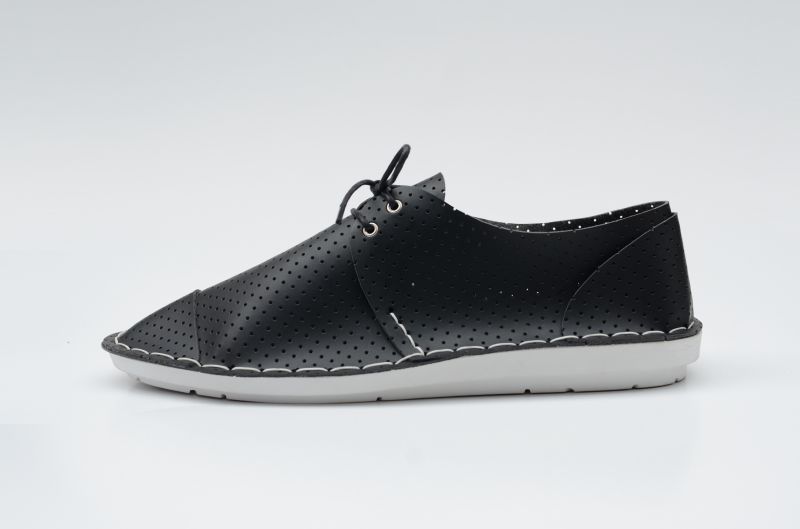
Choose the materials.
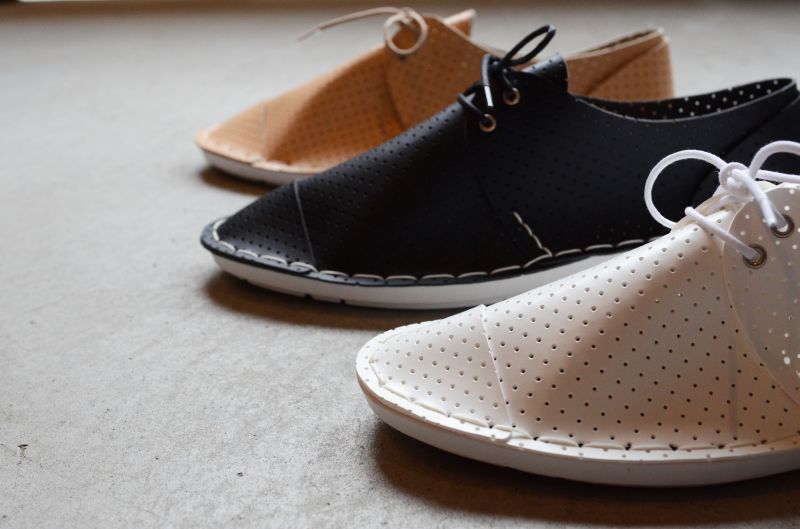
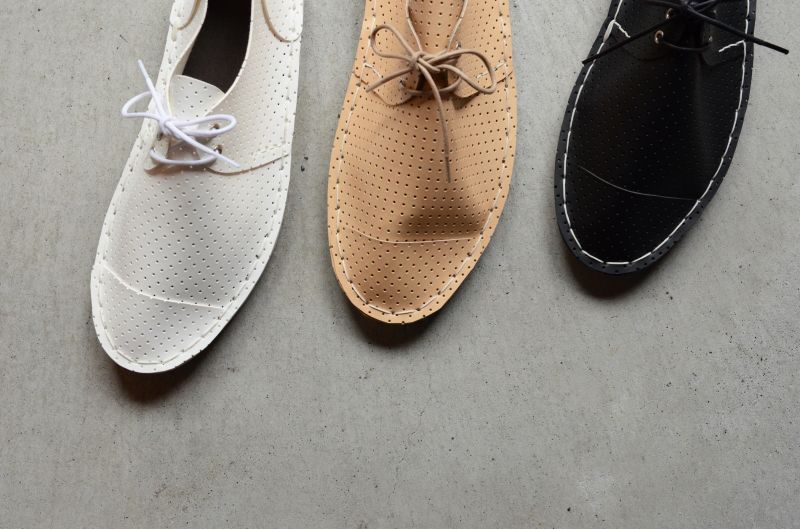
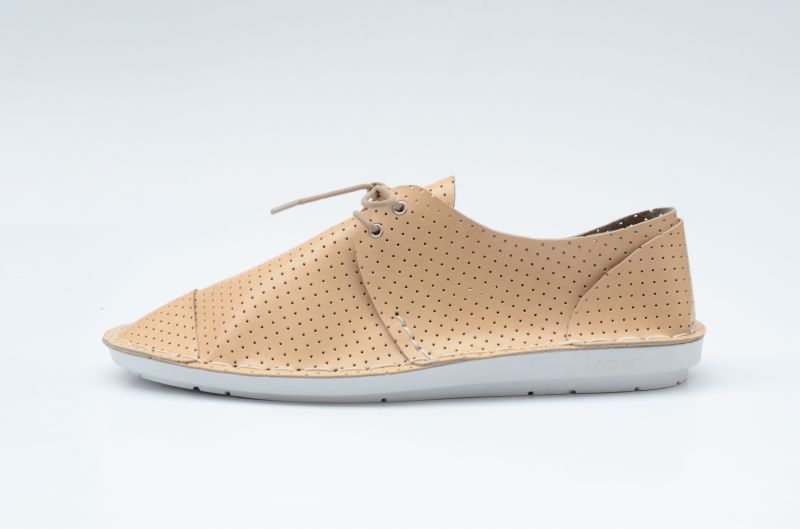
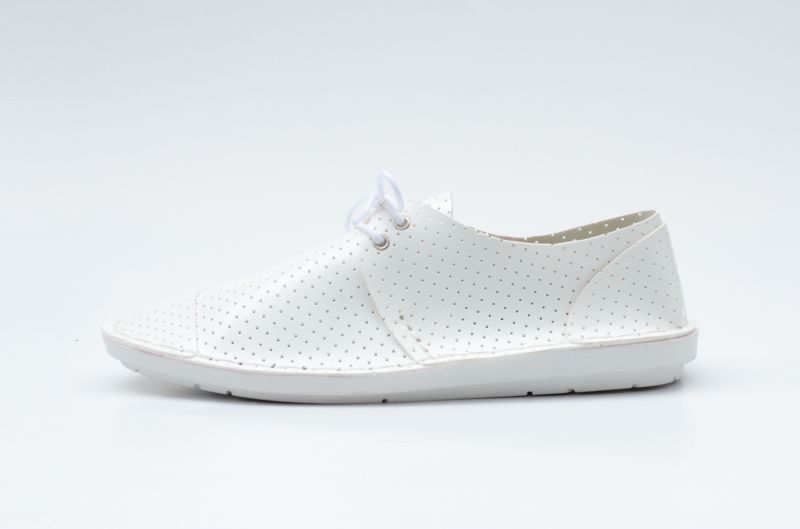
Made in Japanese PU leather with excellent water repellency and durability.By punching, breathability and lightness have been achieved!
Available in black, white, and beige
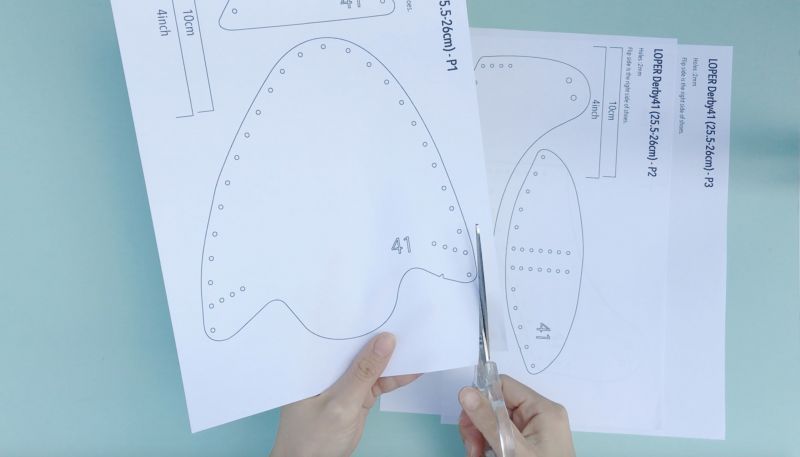
Step3
Cut out the patterns with scissors or sharp knife.
Step4
Step5
Trace the patterns on the material with a pen.
Step6
The printed side of the patterns are for the left shoe, flip the pattern to make the right shoe.
It's good to write on each patterns, 'right' or 'left' to prevent the mistake.
Step7
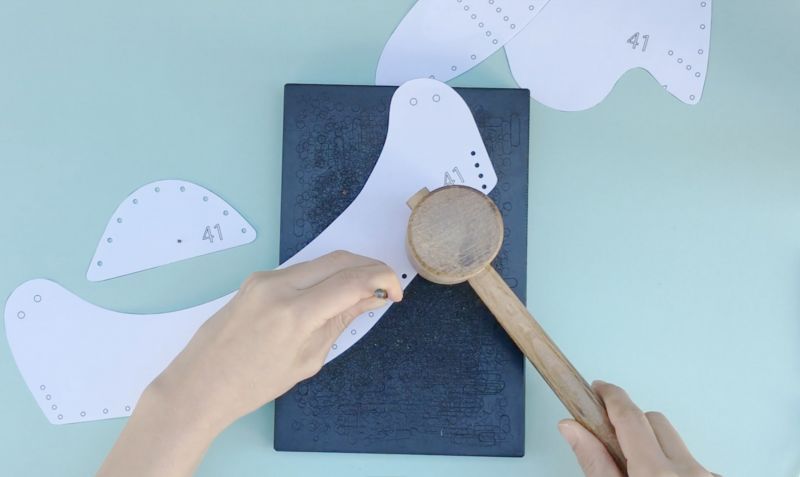
Cut out the materials along the trace line and punch the holes.
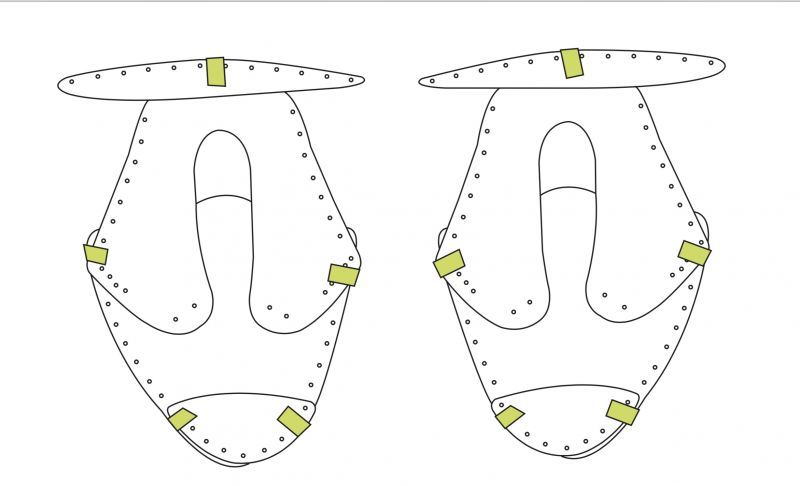
Step8
After cutting all the patterns, temporarily fix the left and right parts with masking tape at the correct positions.
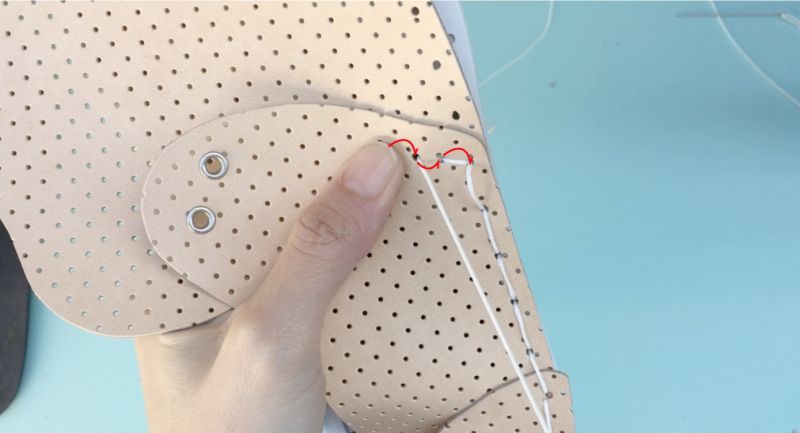
Step9
Pass the needle through both ends of the attached thread.
Insert a needle in position A and thread the threads until both threads are the same length.
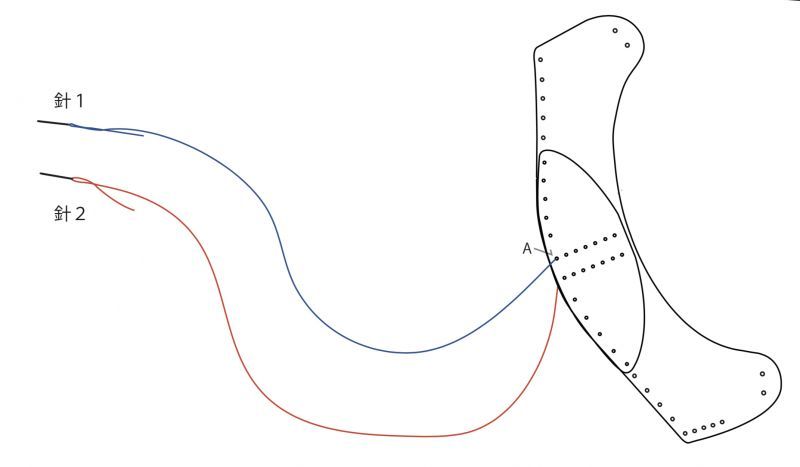
Sew to point D with needle 1.
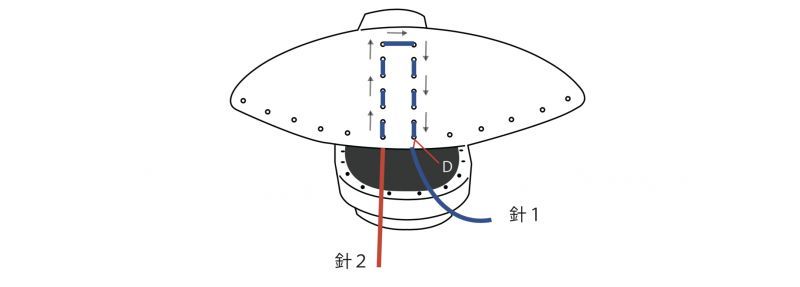
After sewing needle 2 to point D, stab needle 1 into position D on the sole.
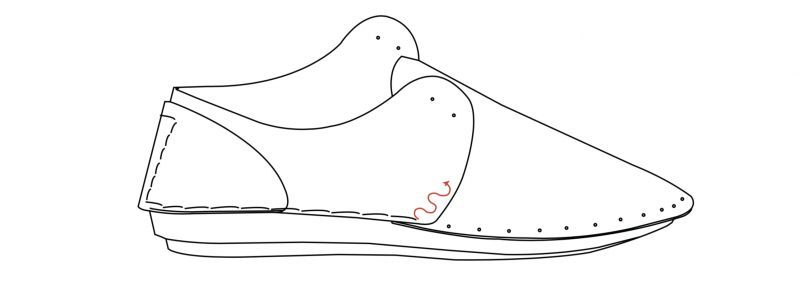
Step10
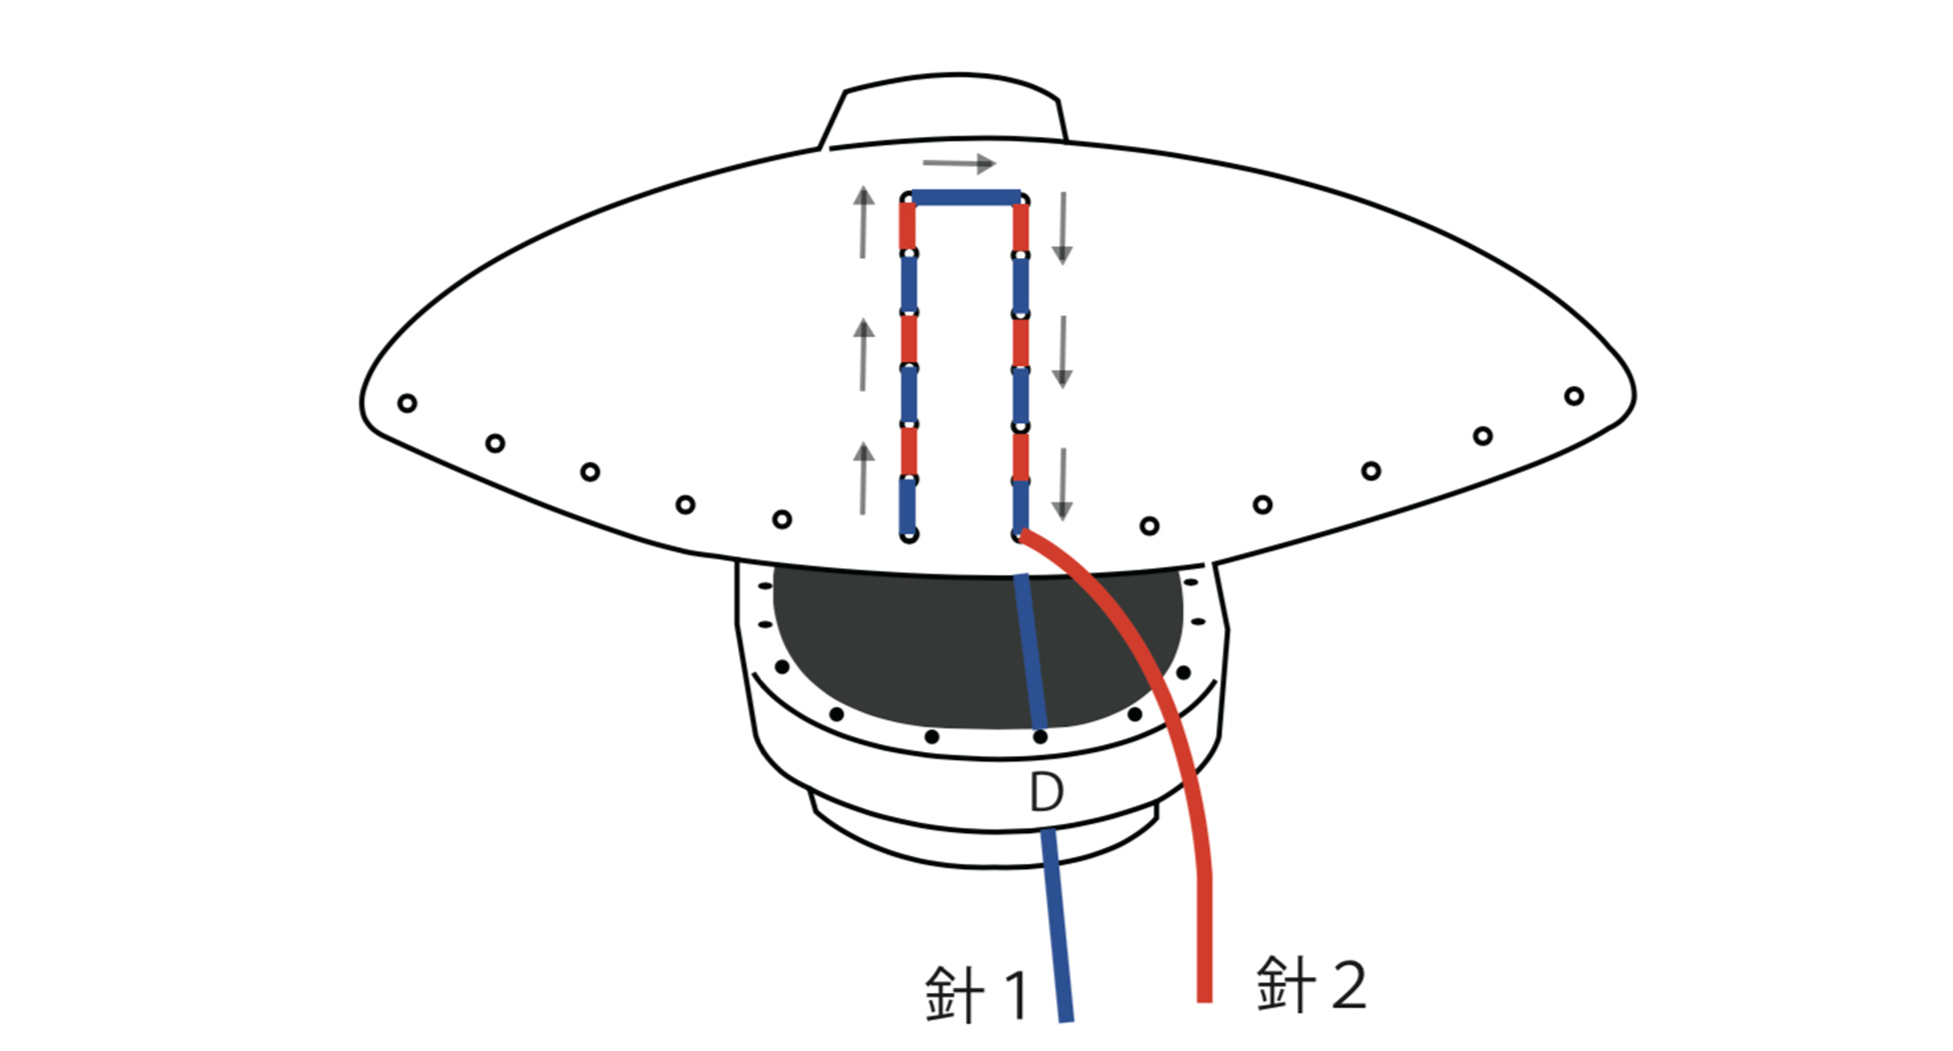
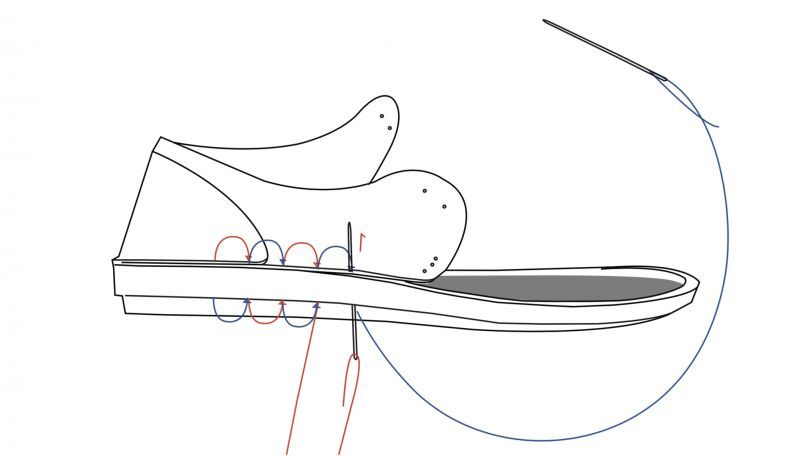
Let's start sewing the uppers and soles together. The upper and sole will be connected with a 'saddle stitch'.
On the side stitch part, sew up and back down with one needle, like in the picture below.
For the finish, sew twice with both threads.
Put out the thread at the position shown in the figure. Cut the thread at about 5 mm.
Firel the thread so that it cannot be unraveled with a lighter.
Put the insole and put the string through to complete!


- Choosing a selection results in a full page refresh.
- Opens in a new window.