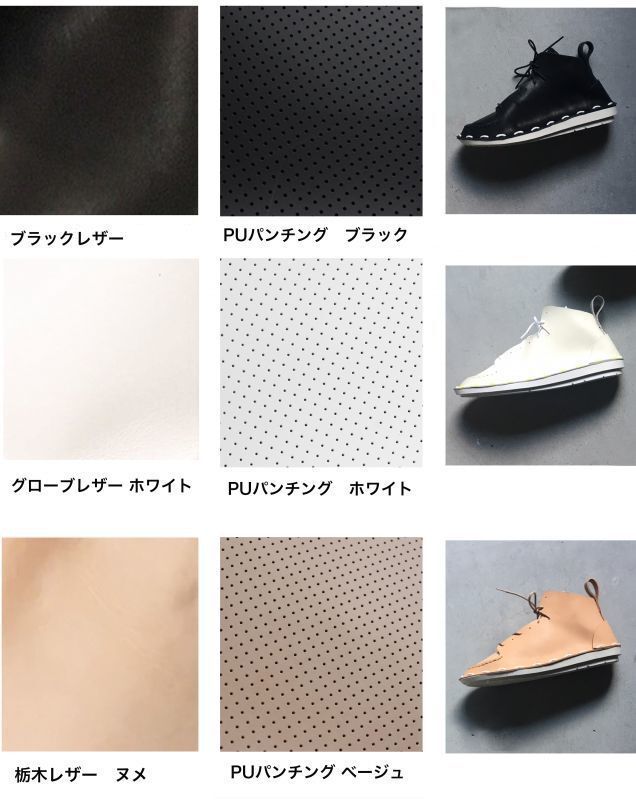
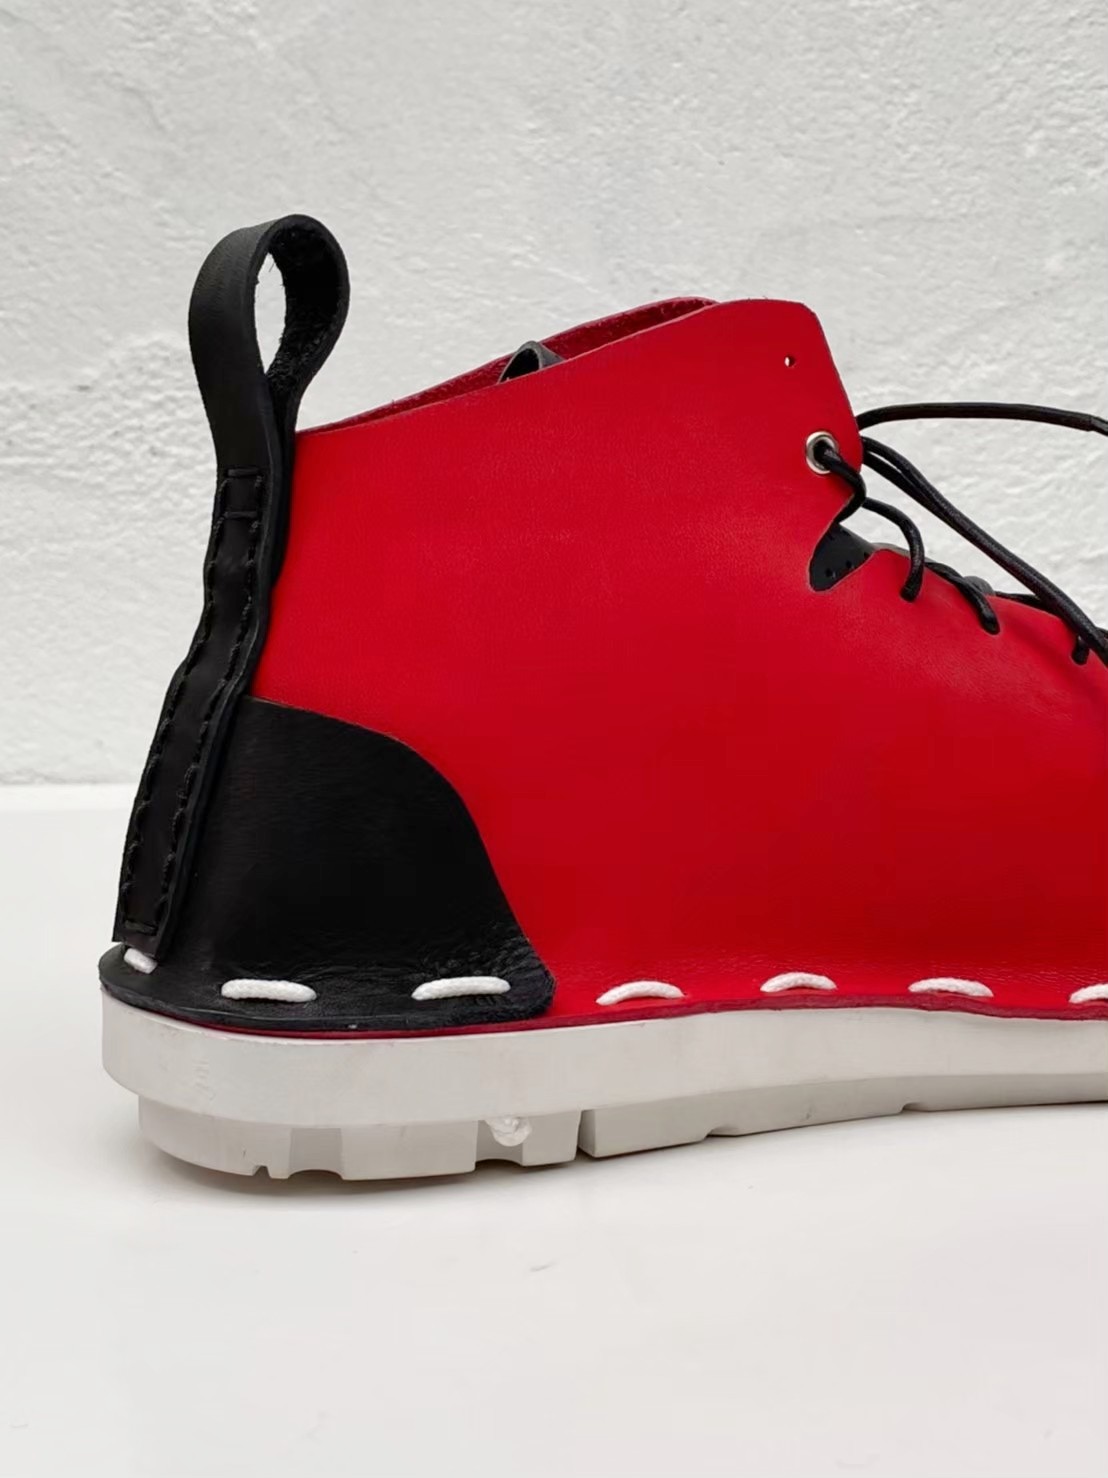
The amount of chrome is suppressed, and tannins are probably included in the dyeing stage to give a moderate elasticity.
The more you wear it, the more it will become familiar to your feet.


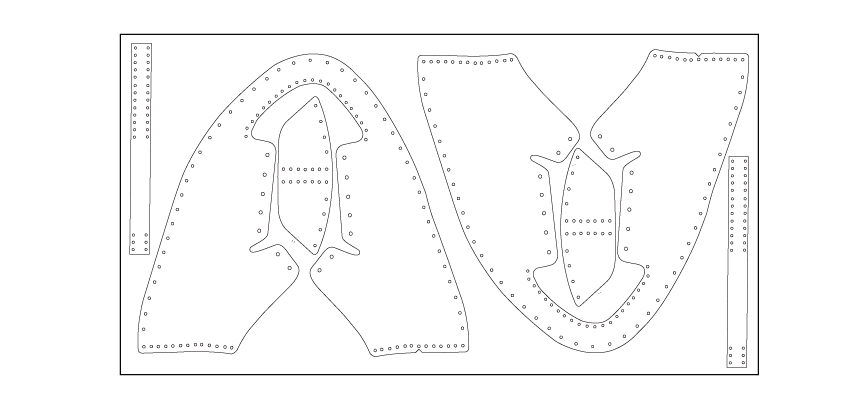
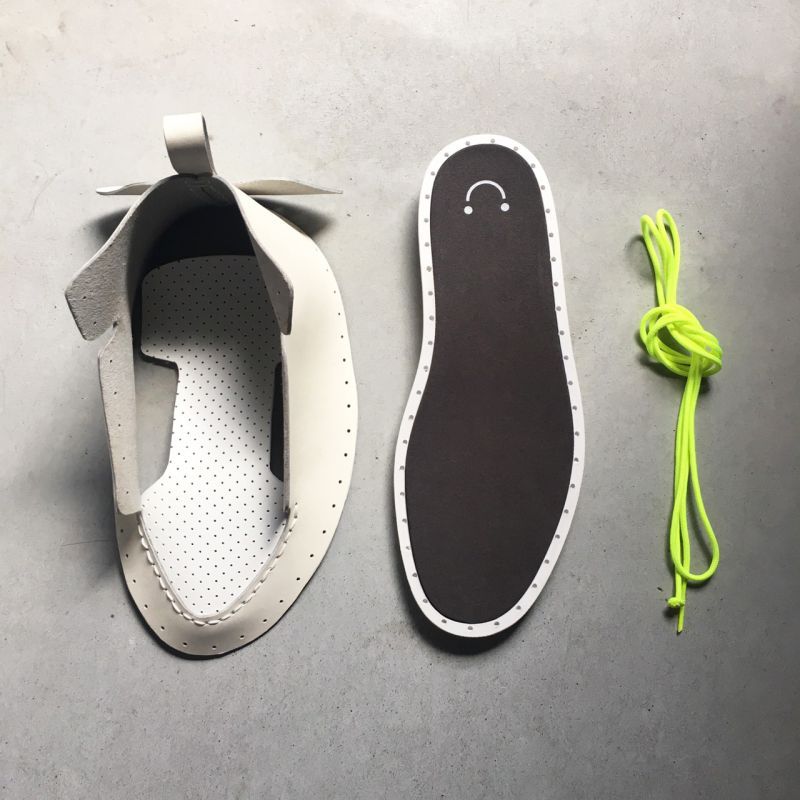
What's in side of Hi-top kit
If you want to prepare the materials by your selfSoleskitPlease check here
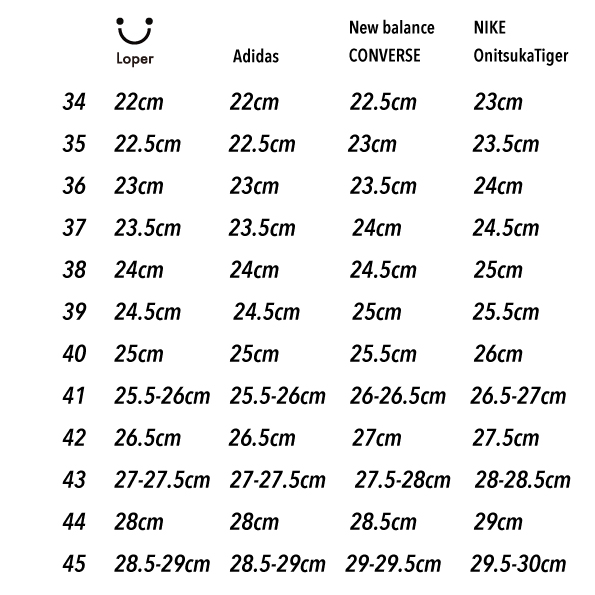
Please choose the size
The size may vary slightly depending on the brand and model, so please refer to the table below and compare it with the size of the shoes you usually wear.
Choose the materials Choose a fabric that is about 330cm x 620cm in size.
期間限定!
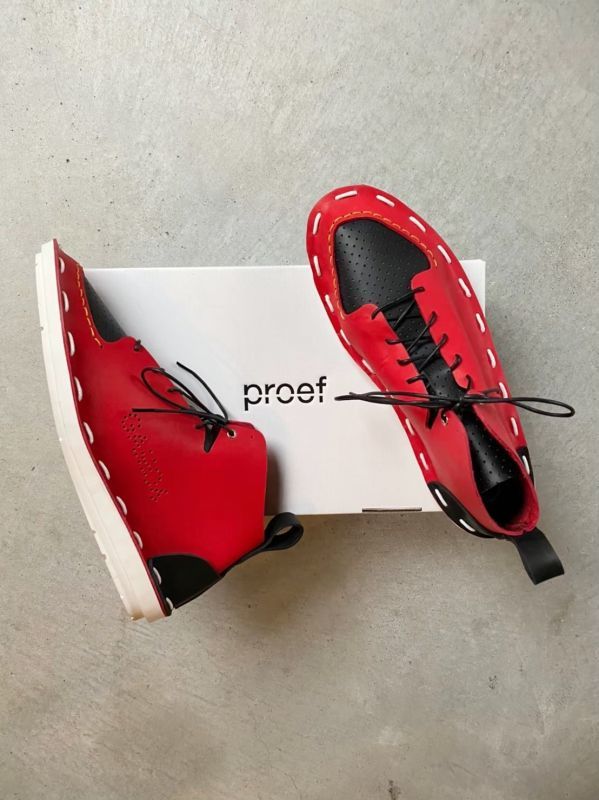
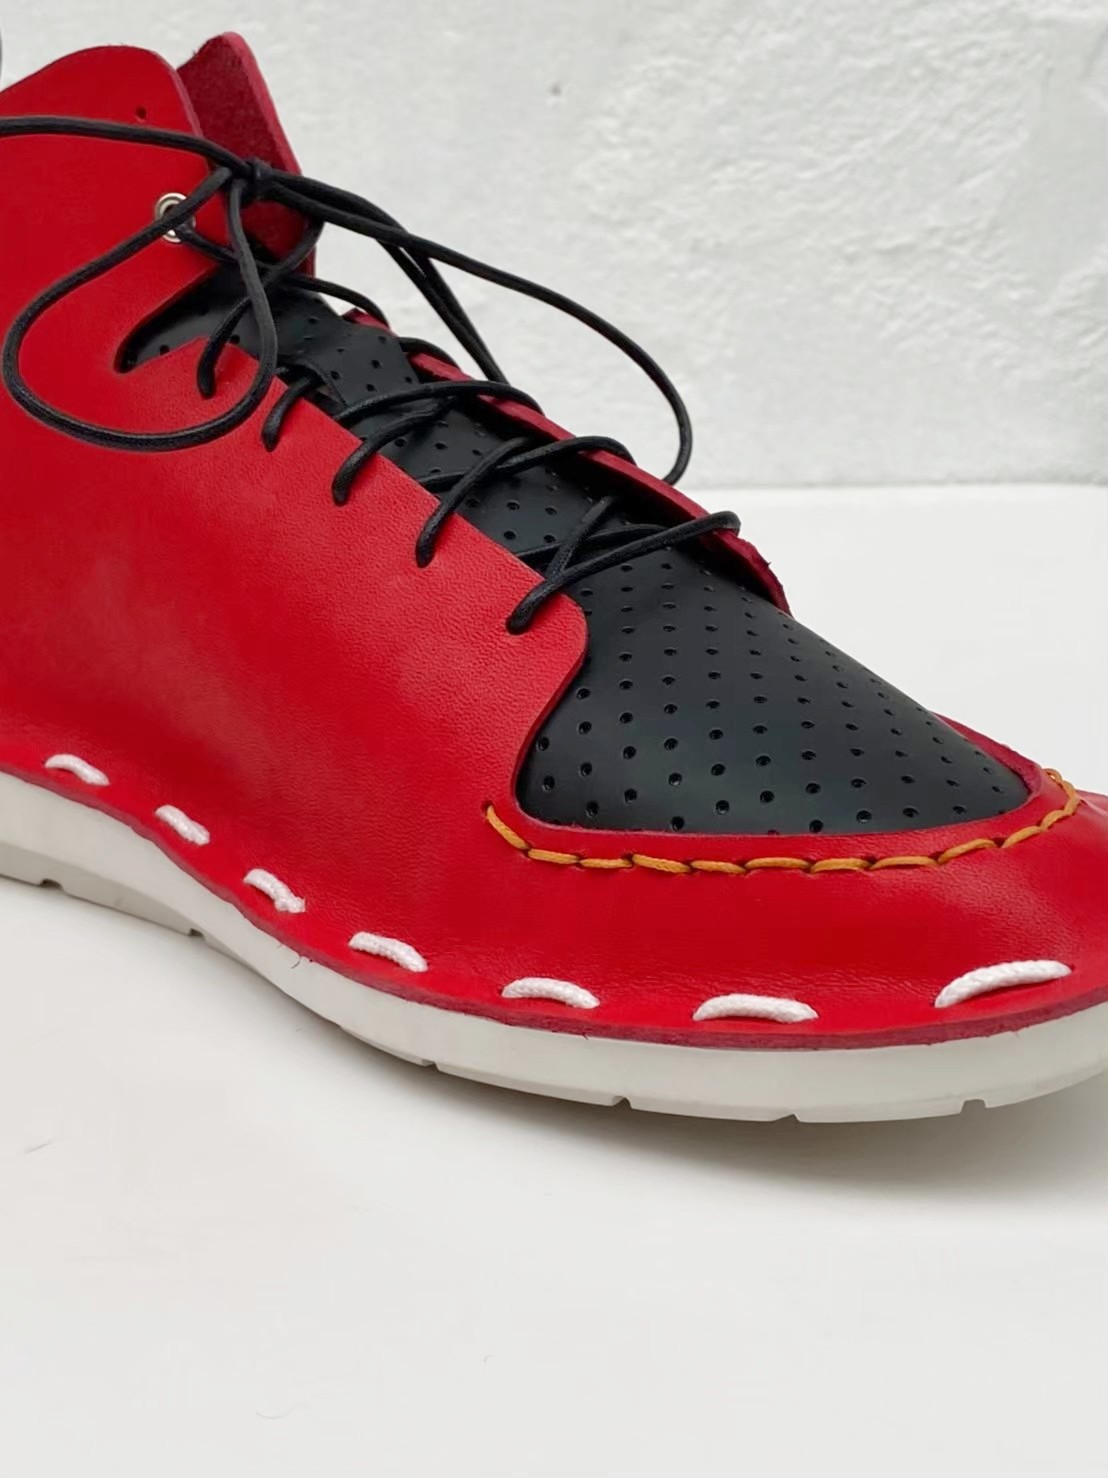
Red x Black
The amount of chrome is suppressed, and tannins are probably included in the dyeing stage to give a moderate elasticity.
The more you wear it, the more it will become familiar to your feet.
The raw leather uses the finest steyr from North America. Glove tanning is performed for the purpose of not breaking the fibers, and it is lighter than conventional glove leather, wrinkle-resistant, and the original flexibility and moist texture of leather is perfect for making shoes.
Tochigi Leather
Tochigi Leather Co., Ltd., specialize in vegetable tannin tanned leather, and it is said to be the highest peak in Japan and finished with almost no surface processing. It is supple and durable, and its tasteful changes over the years are highly evaluated not only in Japan but all over the world. Traditionally, Nume leather has the image of being a hard material that is difficult to commercialize. Therefore, Tochigi leather was created as Nume leather that has both softness and durability by a unique manufacturing method.
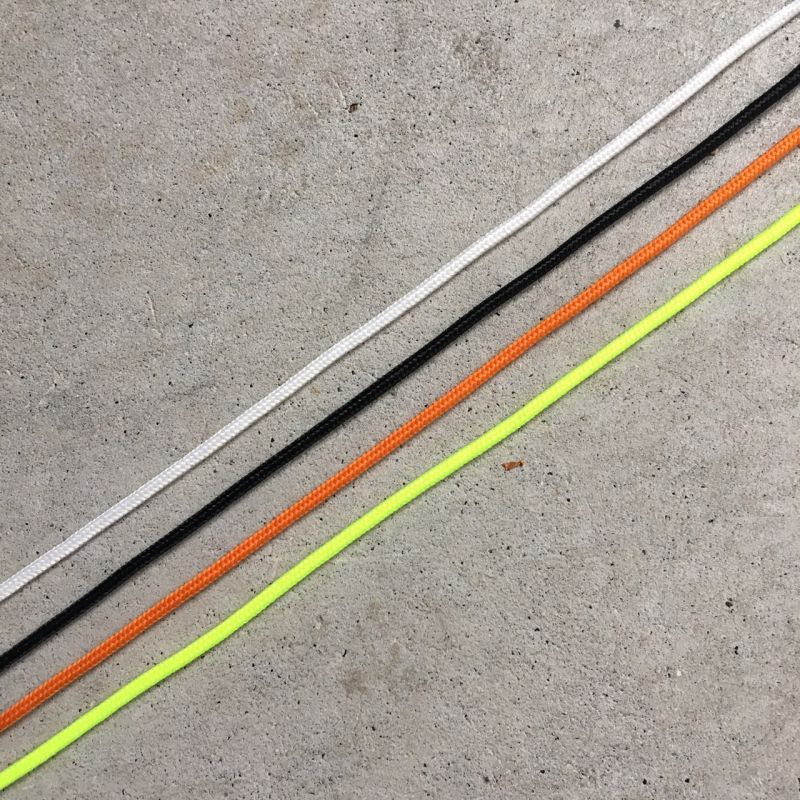
Please choose the rope color from White,Yellow,and Orange
Currently black and yellow are not available.
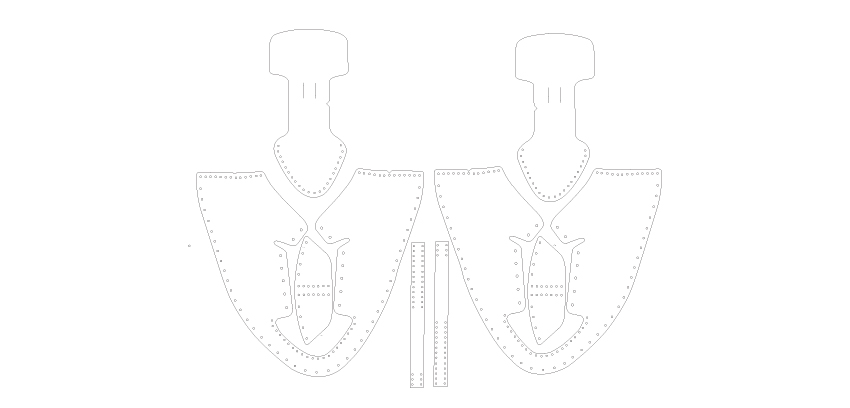
Step 4
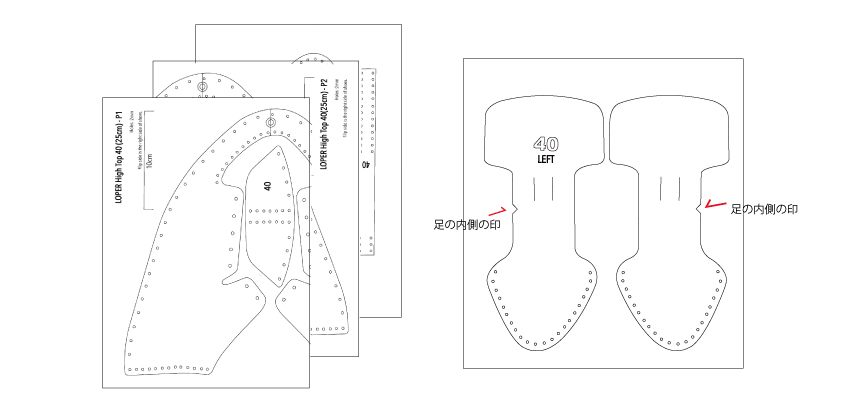
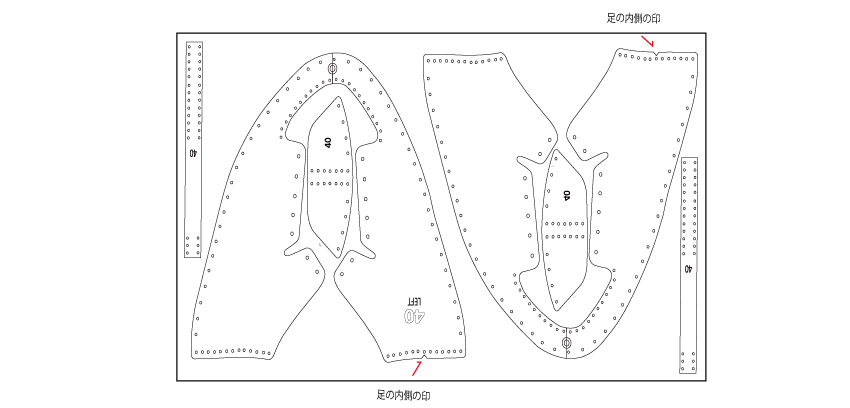
Cut out the pattern and connect it together.
Step 5
There are right and left shoe patterns. If the printed surface is on the left and turned inside out, the pattern on the right foot can be taken.
Mark the inside of your foot on the pattern, and be careful not to mistake the pattern on the right and the pattern on the left!
Step 6
Cut along the lines and marks with a knife or sharp scissors to make a hole.
Step 7
Once you've cut out the pattern for your right and left foot, you're ready to go.
Polishing the edges of the leather chopsticks will improve the quality, so please give it a try.
Step 8
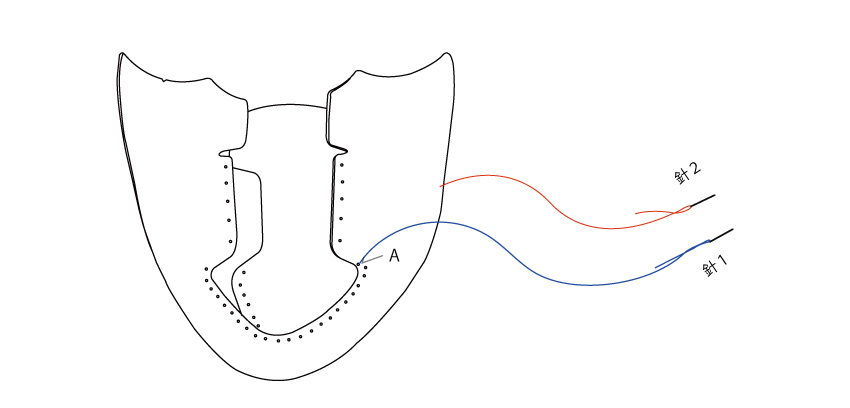
Pass the needle through both ends of the attached thread. Insert a needle in position A and thread the threads until both threads are the same length.

Step 9
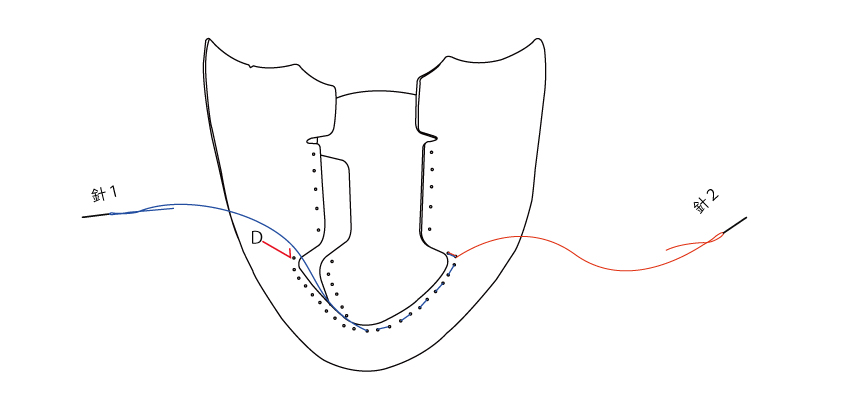
Sew to point D with needle 1.
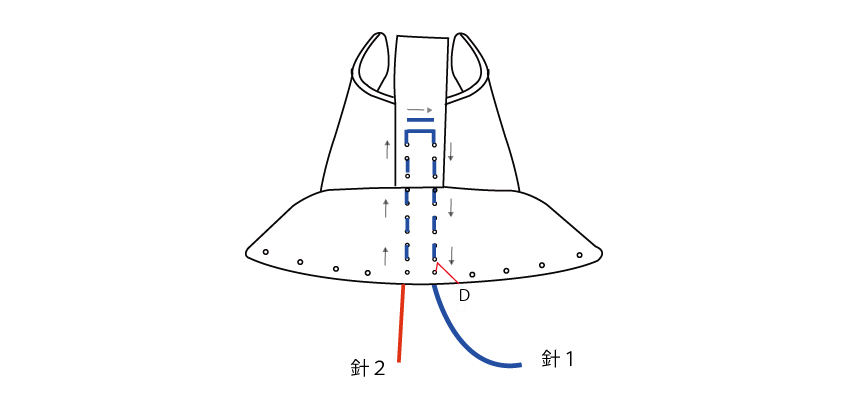
Step 10
After sewing needle 2 to point E, tie a thread between the fabrics and bake it with fire to prevent it from unraveling.
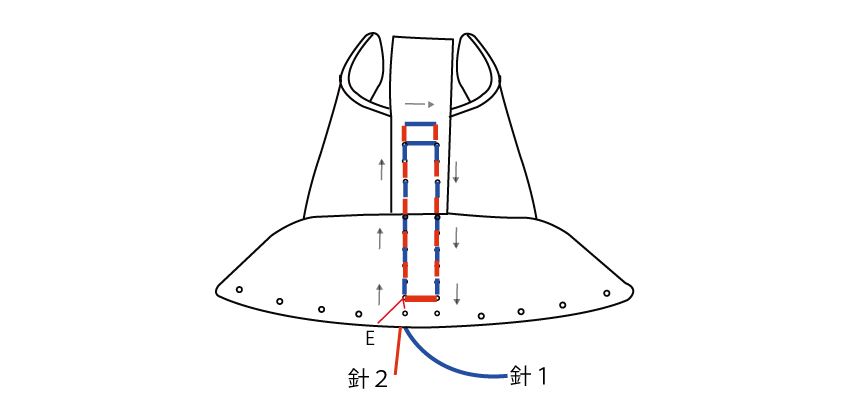
Step 11
Insert a needle in position A and thread the threads until both threads are the same length.
Step 12
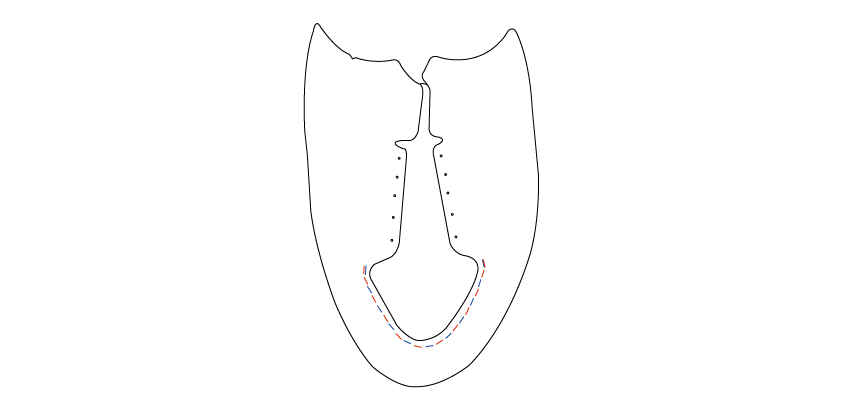
Sew to point D with needle 1.
Step 13
After sewing needle 2 to point D, pull out the thread from between the fabrics and bake it with fire to prevent it from unraveling.
Step 14
Finally, Let's attach the upper to the sole.
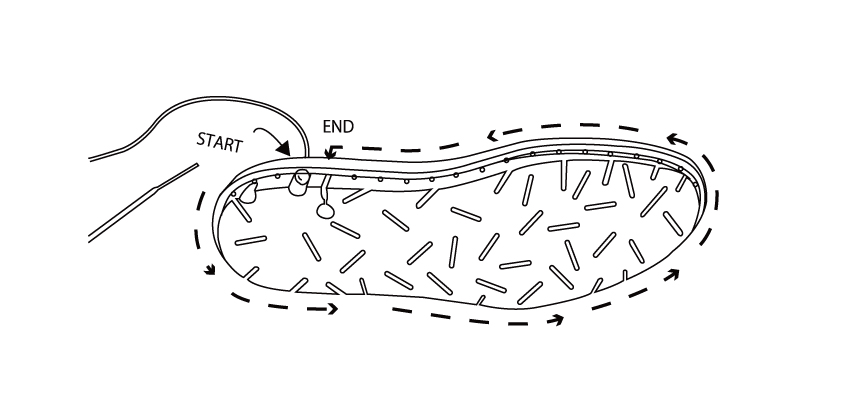
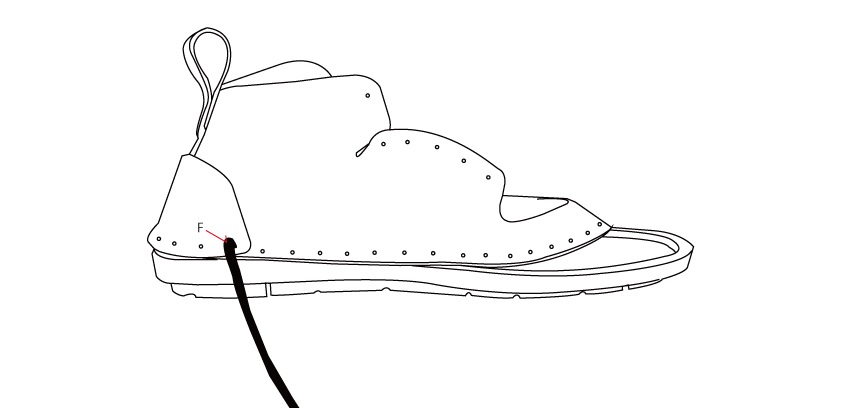
Step 15
Start from point F.
Step16
Step 17

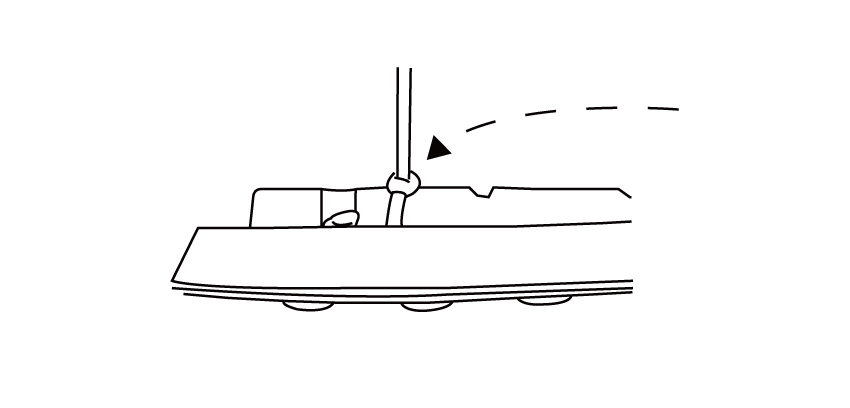
Step 18
Tie a knot around the arrowhead.
Step 19
Cut right next to the knot.
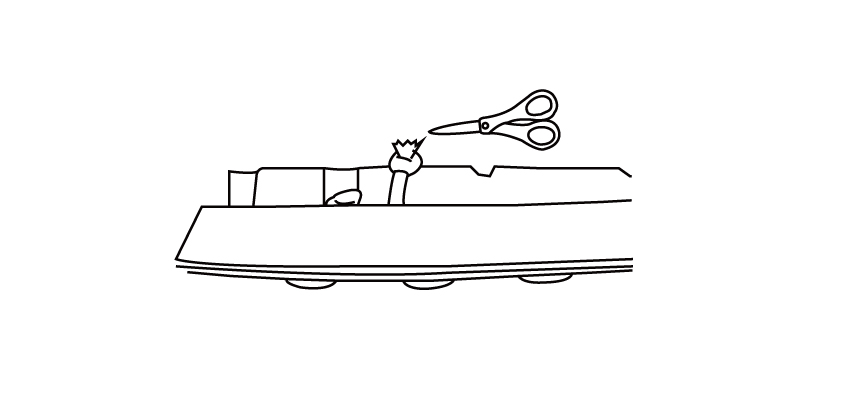
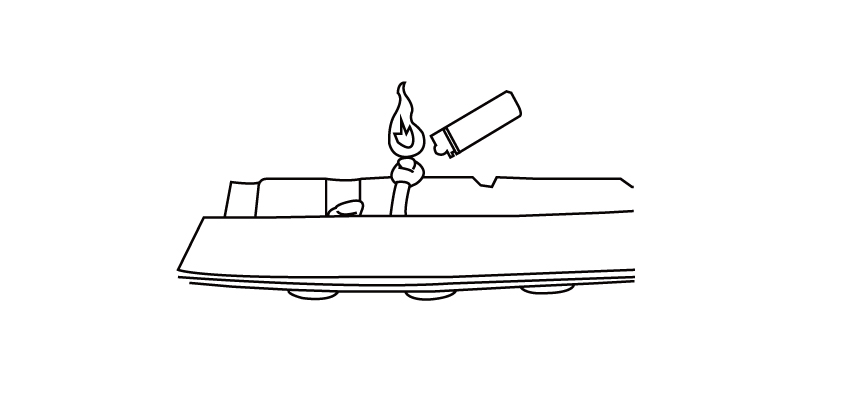
Step 20
Fire the cross section with a lighter and clean it up .
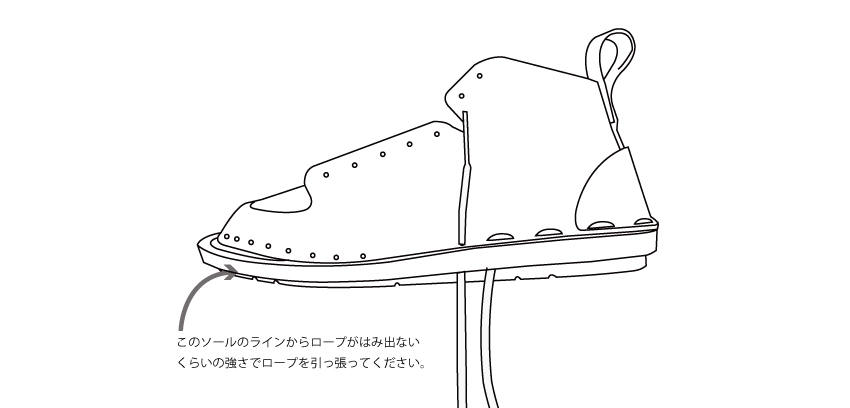
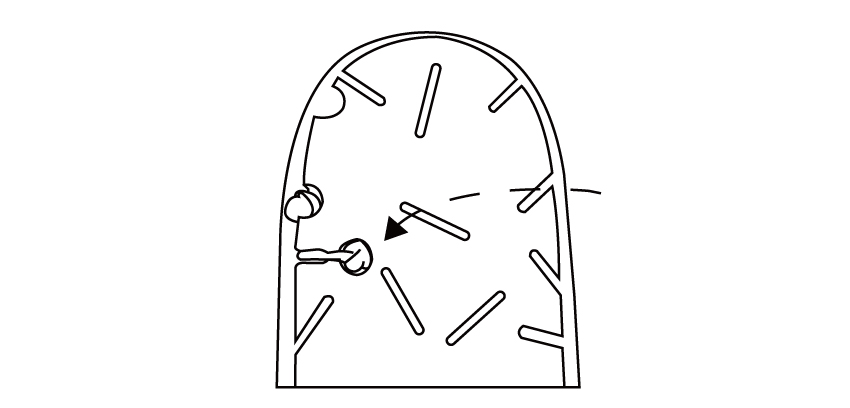
Step 21
While pulling, push it into the hole.
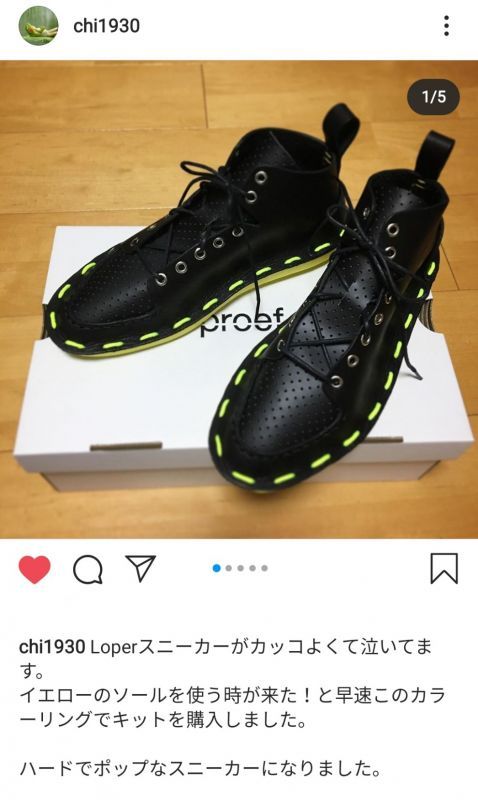
Customer's voice
Our dream for the near future is to develop kids size LOPER's so kids can make their own shoes too.
Shoe manufacturing often is a unhealthy and harmful industry, for workers and environment.
Stop buying shoes and start making them :)
It's fun to do and such a great feeling to walk on your selfmade shoes!